Tuesday 6 December 2022

Enginering Works Complete

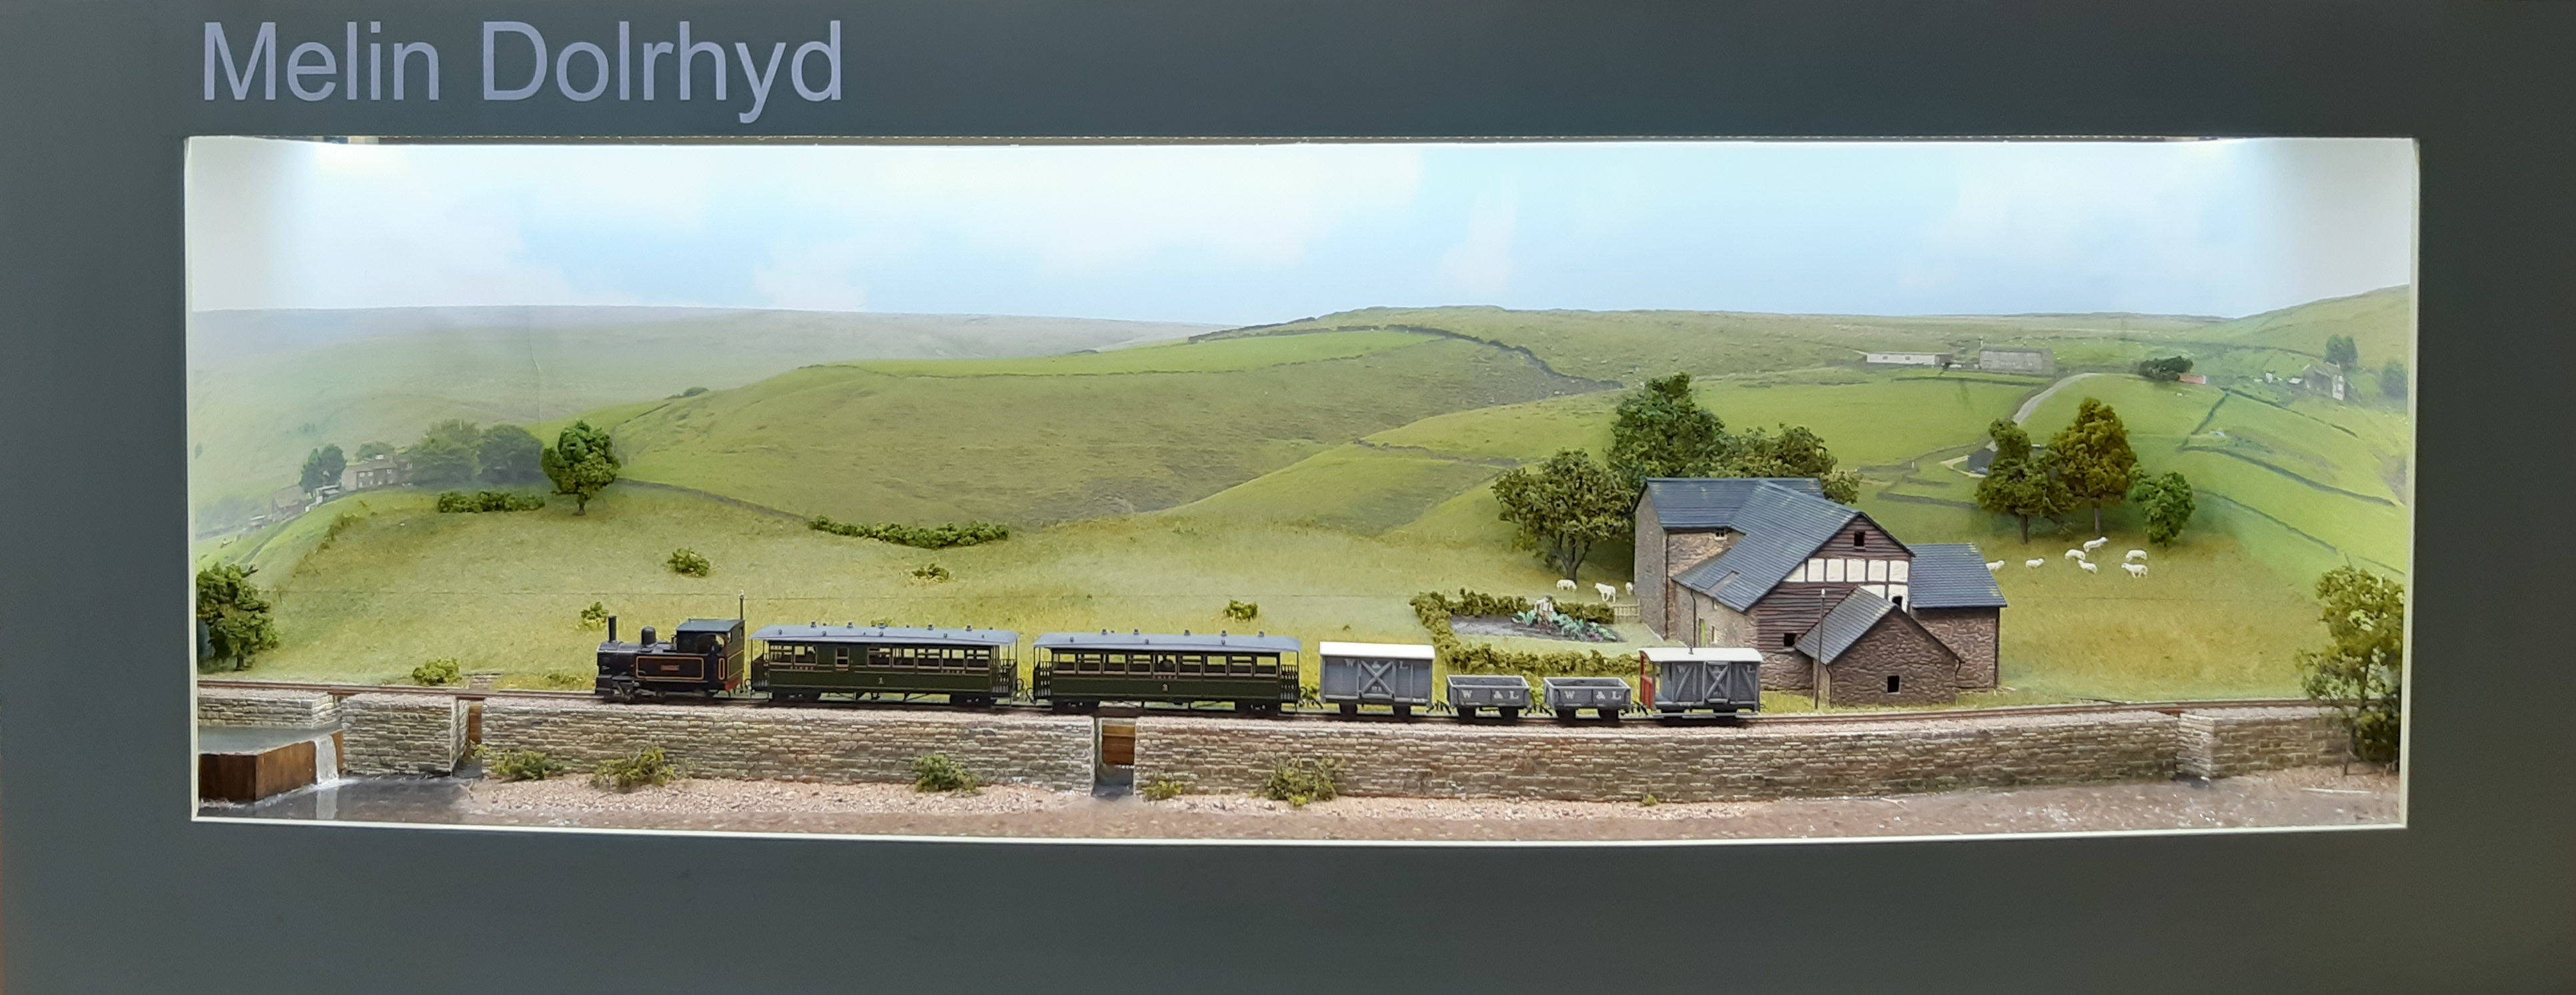
Long post alert! The last few weeks have seen some significant activity to get the layout working again. Mostly it went well but there was one setback...

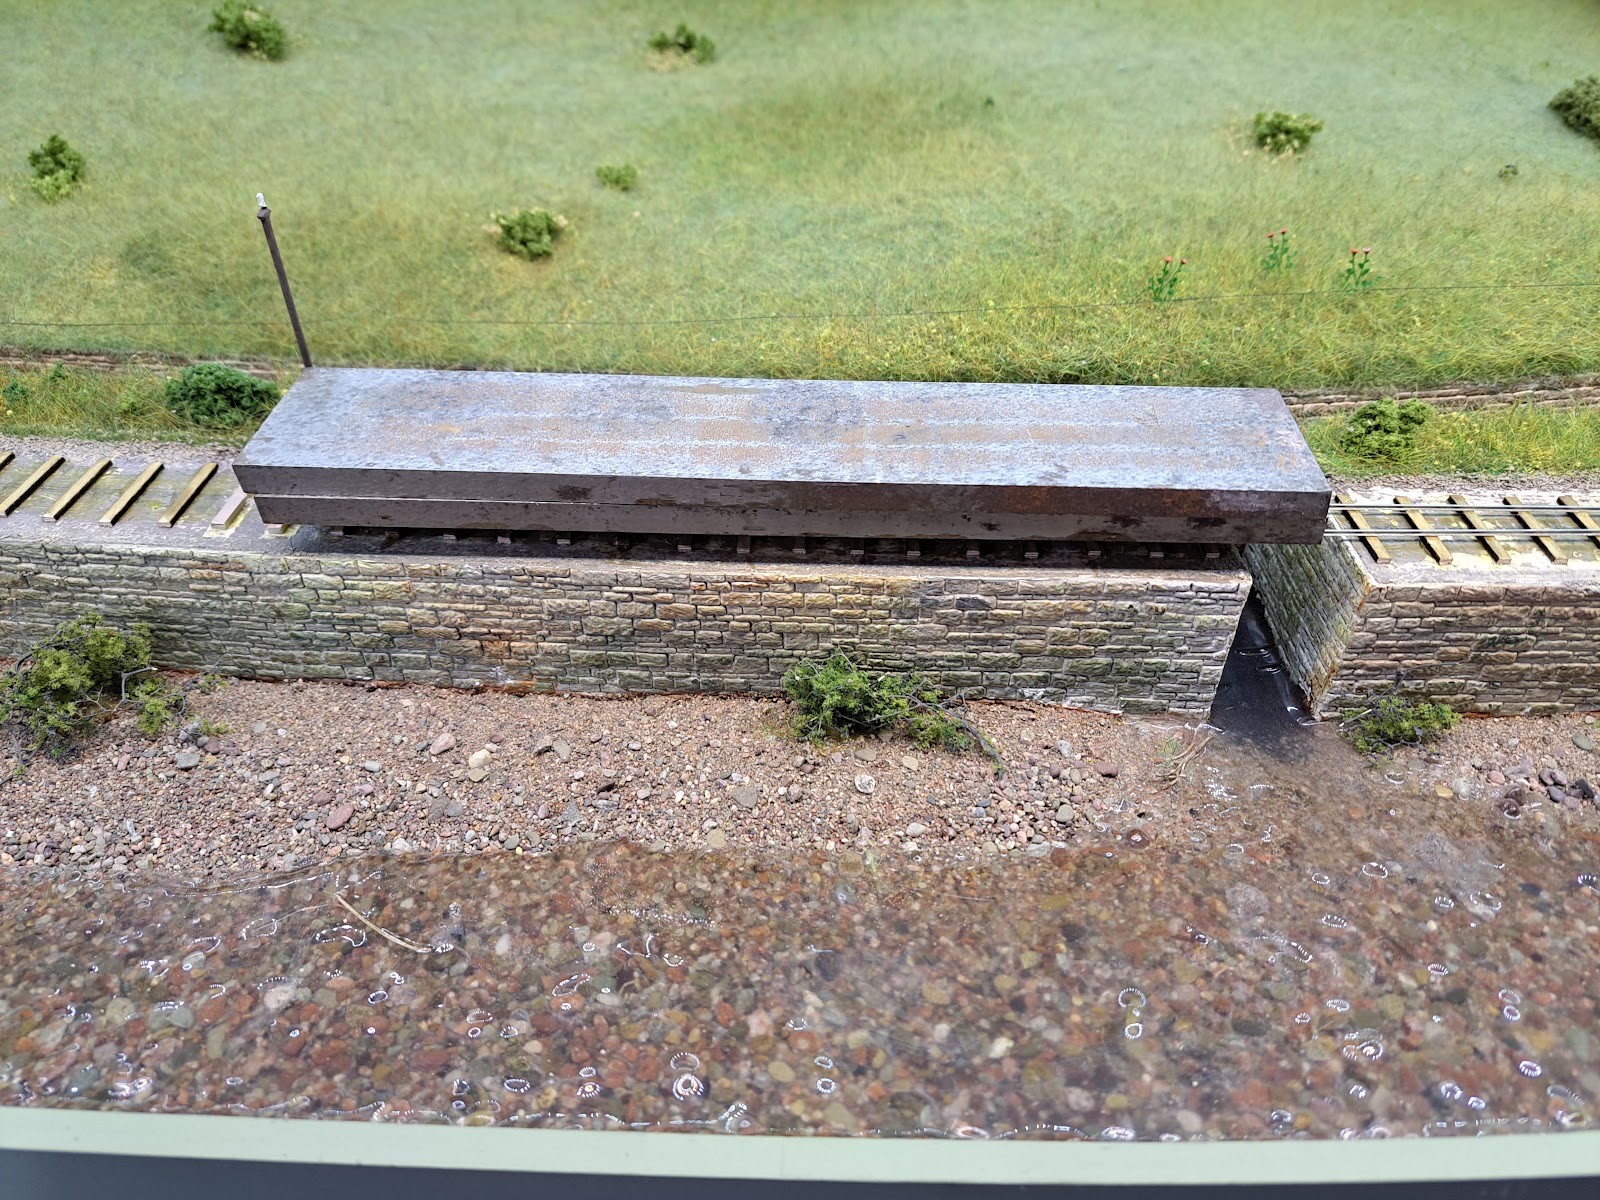
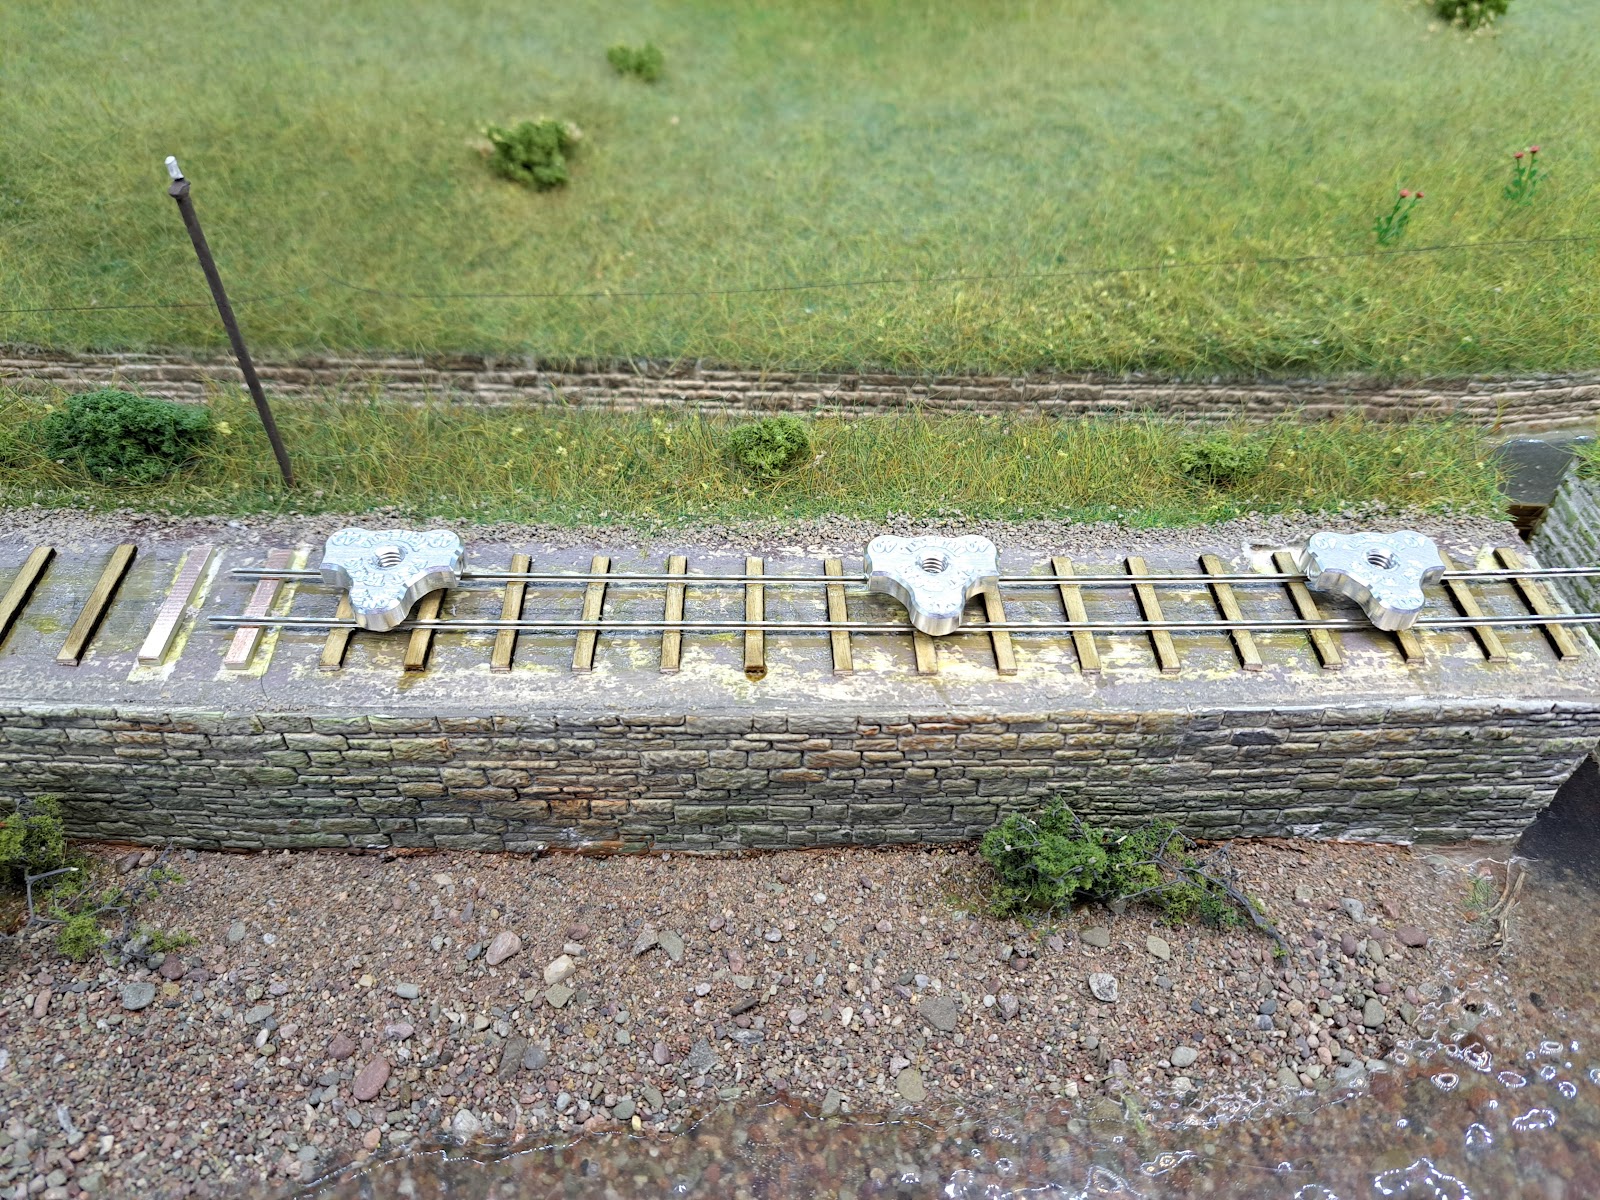
In my last post I said it was time to get on with the ballasting. I decided to use my usual Woodland Scenics but using the medium rather than fine versions. The more I looked at the pictures of the trackbed the more I realised I had been incorrectly using the fine size and the individual stones were larger than I had imagined. I mixed up some light grey and grey to give it tone and put it down. I stuck it down with watered down PVA with the obligatory liquid soap but I did have misgivings on how it looked. It was really too bright and I had made the mix 50:50 and it would probably be better at 80:20. I tried toning it down but that made it worse....

I was going to live with it until I went to Warley and I was perusing the Attwood Aggregates stand. I was taken by the way real stone has variety of colour built in. I took a couple of bags, one greyish one for this layout and another more sandy coloured one for the Ashover layout. I took up the fresh ballast and, needless to say, it went down a lot easier. I don't know if it is because it is natural and not fabricated but it didn't shift when I applied the PVA.

Here's a couple of shots of the ballast including some taken using the macro lens on the phone:


The other big change that I decided to do at the same time was to replace the traverser. The traverser is a great bit of kit but as others will testify, modifying a layout once complete is rarely a wise move which leads to compromises and bodges. My bodge was that the traverser was 48" long but it had to fit into a 51" space. This necessitated some bridging timbers which, combined with some rather mediocre track laying my yours truly, meant that reliability was often an issue with derailments at the joins. Theoretically there really should have been no derailments on a layout that has not points!

If you have followed the blog from the beginning then you'll know that the driver for the traverser was that my original 4 road fiddle yard was connected via 9" radius curves which my newly built coaching stock woudl not go round. I still had that fiddle yard with its dowels to connect to the back of the layout so I dismantled it and used it's front and rear faces along with new sides and top to create the fiddle yard below. 

The yard now 5 roads with the centre one straight. What I have discovered with this layout is that running tends to consist of running the same train round several times whilst talking to visitors and only changing the train occasionally. Hence, the desire to have a straight track to limit the chance of derailments. Last year I invested in a Morley controller which can be seen in the photo below. There is a carefully cut hoel under the controller to take the cabling.


I then had to relay the track on the end boards since the levels had all changed. I took the opportunity to take this very slowly and carefully to ensure good transitions at the baseboard joins. I've found I can put up the main board, fiddle yard and one end board in the room which is how I have been working the last couple of weeks. First is a photo of the underside with the wiring in place and tag strips ready for the necessary point motor wiring. I need one more MP1 point motor and they are in short supply currently. For now it works fine without them.


Here is the completed fiddle yard complete with test track. since Melin Dolryhd only needs one controller it seemed sensible to use the second controller as a test track. The track is wired up and the buffer stops are my own 3D designed and printed coupling height gauges. 


So the engineering works are complete and the layout is ready to go to Maidenhead Show the first week of January. Actually I need to redo the curtains but they will get sorted the week before the show when the layout gets erected in the lounge for a quick check.

Saturday 19 November 2022

Relaying the track

After removing all the old ballast and track I then had to carefully remove any leftover impact adhesive from the old track. Once that was removed it was a case of smoothing it off with a wooden block and some medium grade sandpaper and it was ready to go.

Then it was a case of cutting up the sleepers with a razor saw. The early Cartwright and Russel book on the WLLR states that the sleepers were 6' x 9" x 4.5" at 3' spacing. That meant they should be 24mm on the model but as the track gauge is 1mm smaller than it should be, I decided to cut them to 23mm to keep the visible ratio correct. I used a razor saw and the wooden ones were easy but the fibreglas ones were hard work. Thankfully I only needed 6 - two at each end and two at the track join.


I then went over the trackbed and marked out 12mm spacing and a line of where the far rail should be. the expectation was that I would lay the far rail first and then lay the second rail spaced off that. The first rail was glued to the sleepers with impact adhesive, doing around 12 sleepers worth a time. Once glued and aligned it was weighted down with a metal block.


  After that the second rail could be glued down and spaced off the first rail using the 3 point gauges which were themselves held down with the metal block. Again, I could do about 12 sleepers at a time, and chose to leave the weight on for around an hour before moving to the next section.


Eventually, once it was all down, I just had to solder the track to the copper clad strip, reconnect the wires and run the first train.


The impact adhesive is a messy way of laying track and I am not sure I would continue to do it the same way for a larger layout. that said, it was all made a lot harder by being an afterthough and having to work within the fascia.

Onto the ballasting, a job that very few people like...


Wednesday 16 November 2022

Time for a refresh

When I was exhibiting Melin Dolrhyd at the Welshpool Gala this year, I was very taken with Martyn Harrison's Castle Caereinion - see the post http://going-loco.blogspot.com/2022/09/return-to-welshpool.html What I really liked was his code 40 track and how it gave a much more light railway feel to the layout. Peco crazy track is excellent for building reliable track quickly but there is no getting away from how chunky it is.

There were really two questions to solve:

  • Would my stock run over it?
  • Was it worth the effort?

To satisfy the first question I had to first obtain some track and also obtain some track gauges. I ordered some code 40 rail from the 2mm Association and some track gauges from FastTracks in the U.S. I already had some suitable sleeper material from the 3mm Society. Once I had all the parts I built a short test track on foamboard. I already had a similar test track with Peco crazy track and was able to compare the two.


Peco on the left and scratchbuilt code 40 on the right. The difference between the two is huge! The track is simply stuck down to the wooden sleepers using impact adhesive. In real life the WLLR pinned the track down. There were no chairs. I was able to run all my stock along the track and none of them bounced on the sleepers, not even the oldest engine in the fleet.

That leaves the question of whether it is worth it. I came away from the Welshpool Gala energised by the show but dissatisfied with the operation of Melin Dolrhyd. The front of the layout was fine but the traverser was not as successful as I had expected. Much of this can be put down to having to make a 4ft traverser fit in a space which is just over 4' 3" long. There were packing pieces and packing pieces and the traverser never seemed to be level across all the tracks. Derailments were more frequent than they should have been for what is essentially a straight piece of track. The traverser is an excellent piece of kit but is overkill on Melin Dolrhyd and suffers from the curse of being a modification to an original design which didn't plan for it.

Taking on board my dissatisfaction with the running I decided it was worth the effort of replacing the track on the front along with replacing the traverser on the back. I'll cover the rear of the layout in another post.

Once the decision was made, I ordered some 1m lengths of track from C&L Finescale along with some roller gauge and they arrived on Friday. I popped across to the 3mm Society West Byfleet meeting on Saturday to pick up some deeper sleeper material which meant I had all the materials necessary to start, so start I did.


The ballast had been stuck down with the usual pva mix and the track itself was originally stuck down with impact adhesive. I used a dropper to wet the track and then worked away at the ballast with the screwdriver I use for almost every task where I don't use a scalpel. The track itself lifted relatively easily. The track bed is foamboard so I was worried that the card cover would soak and tear off, but it has stayed so far.


In fact it all came off quite easily with the exception of one of the baseboard joins where the card did tear off. In the next post I'll cover preparing it all and laying the track.


Saturday 5 November 2022

A Little Bit of Publicity

 At the 009 Society local group meeting last weekend I was indebted to one of the members, Derek, who pointed out that Melin Dolrhyd was featured inside the recently published issue of Narrow Gauge World and there is also a photo of Melin Dolrhyd on the cover.


It's not a magazine I usually look at so I was very grateful for the heads up. The article covers the Welshpool Gala and the presence of three Welshpool themed layouts at the Gala. Andrew Charman did the photos and has taken a pleasing angle of the layout with an original train. I'm not sure where the words came from but they do remind me I need to get on and build the engines I have waiting for the layout.

Sunday 16 October 2022

Coaches 2, 3 and 4

Why the strange title? Very simply, back in April this year I posted that I had completed the first of 4 Ashover coaches. Now I can say that I have almost finished the rest.


The main tasks done since the last update is the lining has been finished on them all. After I took forever to line one side of a coach, my good firend Matt Kean offered to line the rest and finished them off over several evenings - something that would have taken me a few weeks.

I also had to make the rest of the roofs. These are 10 thou brass, 0.35mm brass wire soldered on for rain strips and my own 3D designed and printed torpedo vents glued on. The roofs are simply sprayed with Halfords grey primer and then liberally coated in Humbrol dark grey wash which is then dabbed off with kitchen paper.

Lastly, I glazed all the coaches. This was a tedious job. I found some old Wills packets that had suitable clear plastic that wasn't scratched or cloudy. This was cut into strips (and it is tough to cut) and then stuck in with Kristal Klear. I like using Kristal Klear because it isn't runny and if it gets onto the visible part of the glazing (and it always does), it can be teased away with a cocktail stick as it dries into a rubbery consistency. The first coach took well over the hour but by the time I was onto the last one I had it down to 40 minutes. There is a lot to be said for doing tasks in bulk.


Here's a close-up of coach number 2. The roof isn't stuck down as I need to add some people. There is one last job to do which is to fettle the bogies. When I test ran the coaches round Melin Dolrhyd I discovered that they didn't get round the 12" curves without derailing. Unfortunately I had not been sufficiently careful when assembling the bracke stanchion with the result that they angle inwards limiting the amount of swing on the bogies.

The goal is to get these really finished this week ahead of starting a major update to Melin Dolryhd. More on that when the post man delivers the necessary bits!

Thursday 8 September 2022

Return to Welshpool

That was an excellent weekend at the Welshpool & Llanfair Gala. The trains were good, the models were good and the company was excellent. Melin Dolrhyd provoked much discussion about the state of the mill now and how it looks a bit of a mess compared to the idyllic scene I have created. Martin Rich did an excellent job of looking after us and provisionally I have an invite to return next year.

There were some excellent other narrow gauge layouts there as well. the layout that interested me most was Martyn Harrison's "Castle Caereinion". What caught my attention the most was the hand built track using Code 40 rail from the 2mm Association. It seriously makes me think about replacing the track on Melin Dolrhyd. After all I only have a 4' 3" stretch of plain track to change...

The other item that caught me thinking about what else I need to do is that my model of Joan is undetailed and looks very poor compared to Martyn's version. I know I did mine quickly as spare stock for the layout but it is time to revisit it.

The layout on the other side of me was Peter Cullen's "Welford Coppice" - a small quarry layout that includes both OO and OO9. Very well modelled.


Mark Holland's "Spirit of Welshpool" was also in attendance supported by the Sussex Downs 009 Group. Having walked through Welshpool on Saturday morning on my way to breakfast I can attest that he has captured the essence of the railway.


Blair Hobson's "Ostrovia" was also there. This is an HOe layout which runs stock from different countries over the day.


To round off the 009 Society presence, we had Julien Webb and Steve Mann from the West Midlands Narrow Gauge Group flying the flag, modelling, talking and encouraging people to join.


There were layouts in other scales but I didn't photograph them all. Dave Gauntlet of "Banwy Models" had a small display case showing his various 3D prints whcih look superb. I already have 2 bolster wagons from him partially finished.

Outside the shed the trains were running and there were busses, classic cars and various steam vehicles. Below is a taste of some of the items of transport that were around over the Gala Weekend including "Premier" from the Sittingbourne and Kemsley Light Railway which I finally managed to see at 5pm on the Sunday!


Friday 22 July 2022

The Exhibition

When I first had the idea of building Melin Dolrhyd I had the vague thought that it would be nice to exhibit it at the Welshpool Railway itself and, all being well, Melin Dolrhyd is set to appear at the Welshpool Gala, this coming September. There are a some details on the WLLR website and some more on the 009 Diary. The gala itself takes place from Friday 2nd September to Sunday 4th September.

There is a list of ideas for the layout, most of which are around adding detailing and building stock. There isn't enough time to build the two Golden Arrow engines I have for the layout but there is sufficient time to finish a collection of half built stock.


In the front are 13 incomplete wagons which range from one that needs surgery to correct warped solebars to the brake van that is just missing transfers. I've started a discussion with Custom Model Decals about producing some transfers which, with a following wind, should be available in time. At the back are 6 completed wagons that have no stock box to go in. That is another job that needs doing!

It's 7 weeks till the show so that ought to be enough time even though I am not the fastest worker. Let's see...


Saturday 30 April 2022

Fixing up WD wagons

 I've been acquiring WD wagons for my Ashover based layout. I picked up a job lot of them from a good friend but also picked up some from the 009 Society Sales Stand at Narrow Gauge South. Some are Bachmann and some are Dundas. They all need their couplings changing and several of them are missing their brake stanchions.

My choice of coupling is the Greenwich coupling but I have to confess a desire to switch to DG for a shunting layout so that I have the remote uncoupling capability. For now I am going to ignore that itch and focus on converting stock to Greenwich. The locomotives and the wagons all have the standard Bachmann coupling in an NEM socket. Now I know you can get a variant of the Greenwich coupling that is suitable for NEM sockets but I decided it should not be that hard to print an adpator.

Here it is. My version of an NEM socket to Greenwish adpator. All you have to do is take a regular Greenwich coupling, cut of the tang as far as you decide and smooth off the edges. It simply pushes in and then, when you push the adaptor into the socket that helps hold the coupling tighter. They are quick and easy to print and you can get a large number on a build plate.

The brake stanchion is not so simple. I did think about asking Dundas Models for some of their sprues but I do have a thing for trying to do things myself. I considered what would be the best material to use. The answer was brass, to provide the strength. However, cutting out parts and folding them and soldering them didn't appeal so I experimented with 3D printing. 

The real life stanchion is a vertical piece of angle iron with fixings to support the rod of the brake wheel. There is also a traingular plate used to bolt the assembly to the bogie. 


 I'm still refining this. I had some concerns about strength but it seems to be okay. On the right is the stanchion in the support asembly needed for printing. I could try and add more detail but it's not going to show, except on the screen.

I'll post a picture of an updated wagon when I have this finalised.

Wednesday 6 April 2022

Coach No 1

Nailsea has been and gone. It was a good show and the layout and stock mostly behaved itself. I did have to return a borrowed engine in a completley dead state but it turned out to be a broken wire. Not something I could fix at the show when I was operating all day. It was great to see friends and to see some quality layouts and be inspired to get on with my own modelling.

I've been lining my first Ashover coach since forever. It's just tedious and the transfers were not always sticking. I had to take advice from Matt who is the master at lining and eventually I developed a technique that worked sufficiently well. It's still tedious and there are 41 individual transfers on each side since I split the long lines into 3 parts.


The lining itself is Fox transfers FG1292 Off white/Straw and I expect one sheet to be enough for all 4 coaches. The lettering and Carriage numbering I commisionned from Custom Model Decals and they have gone on really well. Finally today I put on a coat of Army Painter Satin Varnish to seal the transfers on. I wasn't going to do that today since the weather was foul and I spray in the garden but there was a good break with some sunshine so it got done.

I also finished off the roof. I previously sprayed it with primer before I had put on the rain strip on each side so I stripped it back with and soldered on some 0.3mm dia brass wire. A quick spray with Halfords primer and then a liberal coatning of Humbrol Dark Grey Wash which is then dabbed away with a tissue to leave a mottled appearance.

One confession. I've only done one side! That's good enough but won't do for the planned layout since the Ashover Railway had triangles at each end so both sides will be seen at different times.

Tuesday 22 March 2022

First Outing of the Year

Progress on Ashover models has slowed to a crawl. There is news to report but that will have to wait for another post. This weekend I am taking Melin Dolrhyd out for its first exhibition this year.


I will be at Nailsea Exhibition on Saturday and Sunday. I've checked the engines still run and am digging out all the extra bits I need to take for the layout. I've been thinking what can go wrong and trying to ensure I have enough bits to effect the more likely repairs that could be needed. It will also be the first time with the new car. I did buy the car to fit the layout but I never actually tried putting the layout in it...

If you are down near Nailsea then do pop in and say hello. Nailsea Club do have a website but it is lacking in detail due to some technical issues. If you want to see details on the exhibition itself  I suggest you check out the UK Model Shop entry.


New Year Update

It's been a busy few weeks on the railway front. First it was the SWOONs open day on the Saturday where I had my sales stand for STModel...