Sunday 26 March 2023

More Wagon Details

My good friend, Matt, is embarking on an epic Leek & Manifold (L&M) tale. As is the way with these things, there is much planning and even more stock building. Along the way has been a few requests for bits and pieces such as axle boxes and springs for the coach bogies as well as seats for the coaches.

His attention has now moved onto the transporter wagons. Having built the transporter wagons he needs suitable standard gauge wagons to be transported and this is where another good friend, Simon, comes in. He has produced a beautiful North Staffs open wagon and, as is Simon's way, it's to P4 gauge (necessary in this case in order to fit the transporter wagon) and it runs perfectly - so perfectly that it rolls straight off the transporter wagon.

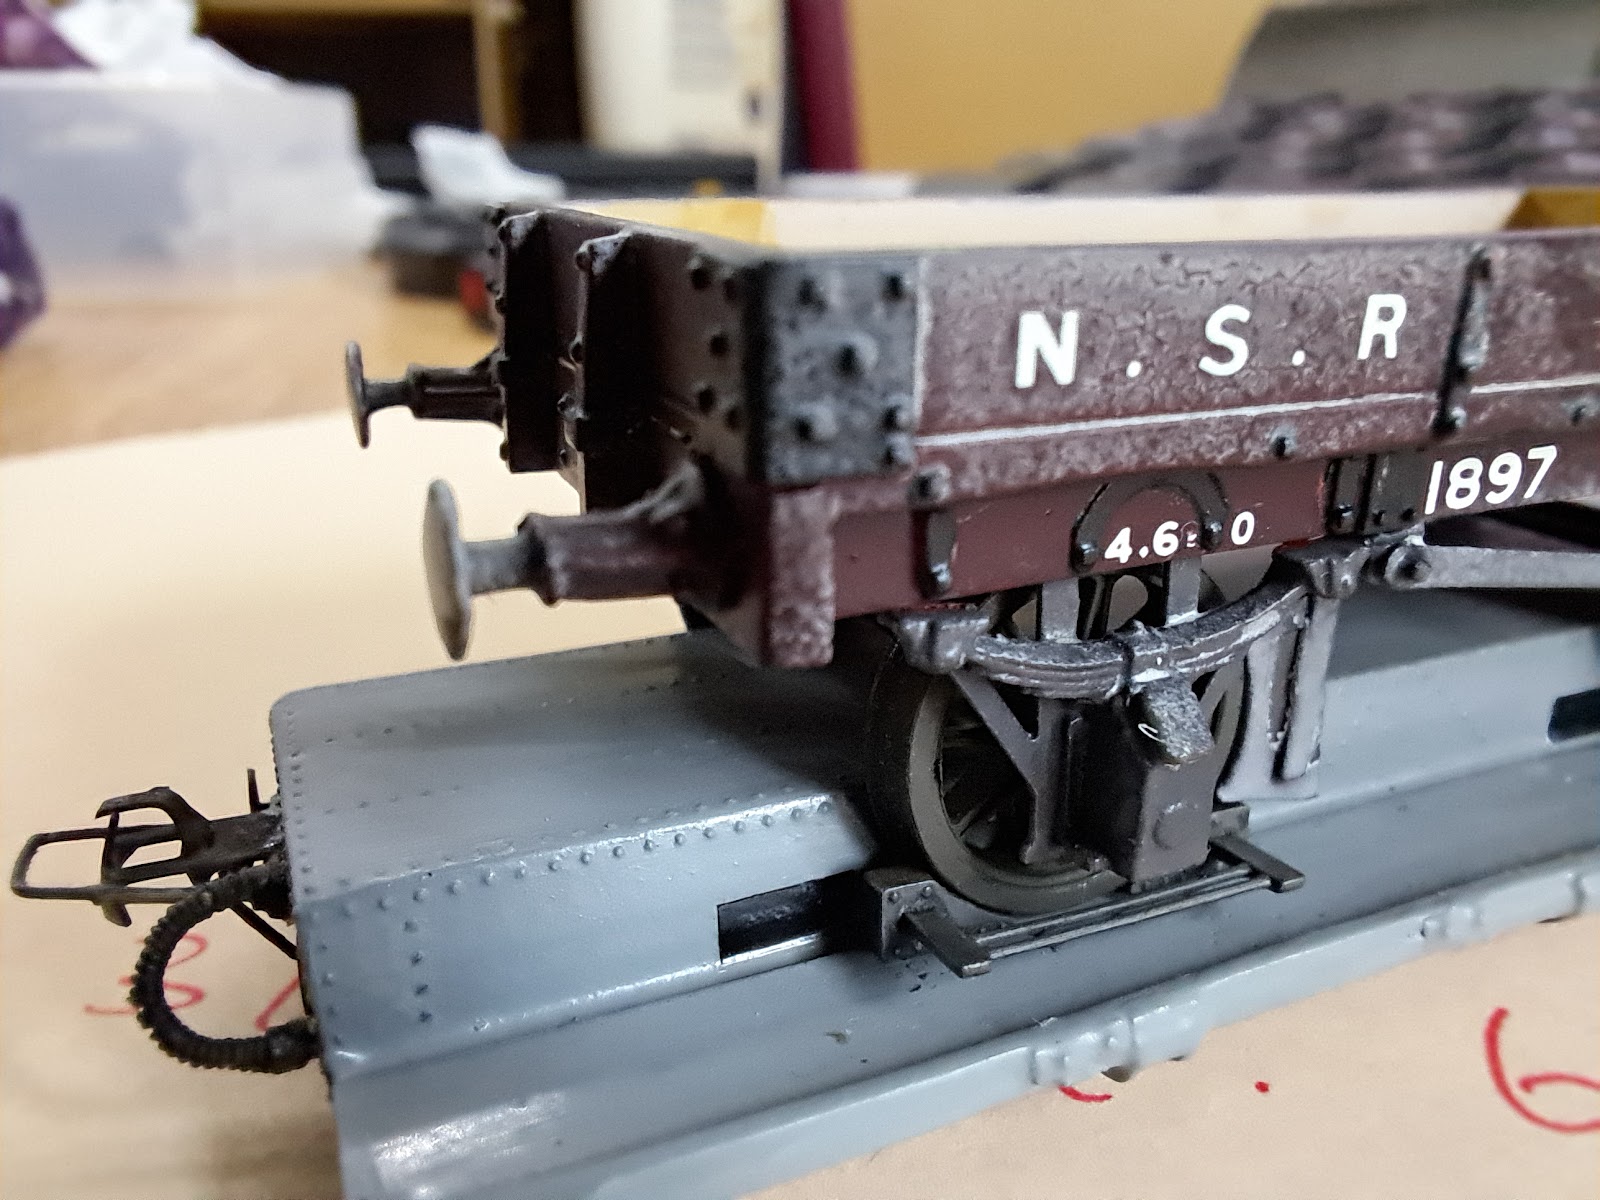
In real life the standard gauge wagons all had hand brakes but the L&M also provided an arrangement of a pair of chocks connected by a pair of rods. These appeared to be of a variety of designs but the reality is that they were probably hand made so differed considerably. I've produced two versions. The first has the side bar protruding horizontally


The second has the side bar protruding up at an angle in order to clear a fold up girder that existed on the transporter wagons as part of handling standard gauge milk tank wagons.

As always, the pictures of the period are unclear and dimensions have to be guessed at. The method of locking the assembly onto the transporter wagon appears to consist of some vertical pieces of metal that slot into the wagon frame but these have not been modelled for simplicity. Here's a cruelly large photo of one of the chocks in place.


All in all it took 3 test prints and then one final print of the numbers that Matt wanted. Each print run takes less than an hour so it's less than a day's work to produce something that can be repeated on demand.

Interestingly, I did try the abs-like resin for this but I found the long thin rods required much more support than the usual resin so I settled on using my normal low odour resin to avoid countless support pips having to be removed.


Wednesday 22 March 2023

Printing Wagon Details

Another piece of work over the last few weeks has been designing and printing some wagon details. 

I am finishing off some wagons pending transfers. In the process I am adding bearings to allow the stock to run more freely. This has sometimes necessitated cutting off the solebar to allow the bearings to be fitted and the solebars to go back on slightly further apart. This isn't an issue since 009 track is technically 1mm narrower than it should be for the Welshpool & Llanfair, so could be argued that it is putting the solebar back to the correct dimensions... 

The process of removing the solebar did result in damage to the brake lever and the brake shoe. Looking around at how to replace them, I did consider the easy way of buying them but couldn't be sure that any on the market were of the correct length. That led me to deciding to print them. 

Looking at the open wagon page in the Glyn Williams book revealed a couple of points I had previously missed. The first is that the brake lever doesn't lie flat against the solebar as I had been modelling them. It actually comes out at a fairly steep angle to the edge of the wagon. The second point I had missed is that the brake lever assembly is fixed to the wagon by a bracket that comes out from under the wagon and up the side of it.

It would make a complicated part but could it be printed?

This is what I was able to come up with. It has a thick spigot at the back of the ratchet assembly. this provides a good surface to glue the assembly onto the wagon. More importantly, it helps it hold a vertical shape.

The piece of the bracket that comes out from under the wagon is very fine and I had to put a fine cut out in the inside right angle to prevent resin pooling there that would prevent it sitting flat on the wagon. the part is far too fragile to cut or file.


The photo suffers from being blown up horribly but it's clear it can be printed and, once glued onto the wagon, is pretty strong.

I used a different resin for this print. Talking to someone demonstrating at the Southampton show recently, I learnt that he uses an abs-like resin for final prints as this is less brittle so more tolerant of  knocks. I decided this would be a good part on which to try such a resin as it is a very vulnerable part, likely to get damaged with handling. The real drawback to abs-like resin is that it is not available in a low odour form so really does smell.

I know I am taking 3D printing to the limit here. On a few of the levers it managed to print the gap in the ratchet part of the assembly, despite being only 0.4mm wide.


The ones for the vans will have to be done at some point but this has pointed the way to a plentiful source of replacements. Then there is the brake shoes...


Saturday 18 March 2023

Basingstoke Show

Last weekend was the Basingstoke Show and I took Melin Dolrhyd. The new fiddle yard worked really well and my fellow operator declared that he liked it which is good from someone who prefers to keep their distance from technology.


It's a very friendly show with a range of layouts and traders, though I understand that several traders dropped out on the day which is frustrating for the organisers and anyone who was coming specifically for those traders.

Sadly, "The Earl" failed to get going. The first hour of a show is always fraught with locos warming up and generally getting into a rhythm. "The Earl" never got into a rhythm. It stuttered it's way round the layout and no cleaning or fettling of pickups was making any difference so it was immediately retired and will have to be overhauled to get back into operation. It is over 30 years old and was made by the late Rod Alcock so it's fair for it to want some attention.

It meant that Dennis, from the Snailbeach Railway was called into service for the two days. I clearly need a couple more engines to ensure the layout only runs engines that have run on the WLLR.

The other noticeable issue was some of the stock on some of the points. There were a few derailments in the fiddle yard. One particular point was very noticeable.


When I got the layout home I set it up again in the lounge and ran stock in a variety of directions. Above is the point that was giving most trouble. As you can see, there is a huge offset on the join between the blade and the fixed rail. When going through the point from the toe, stock was hitting that join and the lighter wagons were bouncing off.

There was also a track offset between two boards which surprised me due to the number of alignment dowels and the track being soldered at the ends. It didn't cause any issues but I have now corrected it so that it shouldn't cause and issues in the future.

I have also embarked on an exercise of checking track and wheel geometry as well as coupling heights. Anything one can do to bring consistency has to help with good running. Thankfully, nearly all the problems occurred in the fiddle yard. The front of the layout was fine.

There were two other narrow gauge layouts at the show. The first was one the Basingstoke Group were refurbishing that they had obtained second hand. The second was "Sandy Shores" by Jamie Warne. This can best be described as a small sand dune shunting layout. It won the Chairman's Choice trophy. Jamie has kindly sent through some photos which are reproduced here. You can also follow his blog here.


New Year Update

It's been a busy few weeks on the railway front. First it was the SWOONs open day on the Saturday where I had my sales stand for STModel...