Thursday 31 December 2020

Flying Tigers!


The next two coaches are going well. They are more complicated than the first coach since they are brake composites. This means that they have more internal partitions and also a guard's doors on each side. I'm adding more detail and this includes a door handle, 3 hinges and a grab rail. The holes were drilled first, 0.35 mm for the grab rail and door handle and 0.4 mm for the hinges. The grab rail is made up from 0.31 mm diameter nickel silver and the door handles came from Roxey Mouldings. The hinges are the same door handles thinned down a little and pushed home all the way. They are very tiny and hard work to file.

The V hanger was also from Roxey Mouldings and then the step was fabricated from 0.5mm brass wire and some etch sprue from the box. In theory tinning of components and careful placement should make it easy but reality says there are two or three attempts before getting it right.

By now you may be wondering why Flying Tigers. I was struggling to hold the carriage and I didn't want to put it on a flat surface  as that might squash the fittings on the bottom facing side. I hit on using these two wooden pallets to support the carriage. They are probably 1/12 scale and came from Flying Tiger, one of those shops that has all sorts of bits you never knew you needed. Hopefully it is clear from the picture how I am using them. I'm not sure if the pallets are still available as I have had mine for a while.

The real advantage is that they are hollow at the side so the application of a clamp and a piece of wood and the carriage is clamped to the pallet and held robustly without damaging any fittings. Hopefully this picture from the opposite direction shows how they have been utilized. Unfortunately the picture also shows where the paneling is marked but hopefully that will not be so obvious once painted.


Sunday 27 December 2020

Painted Coaches


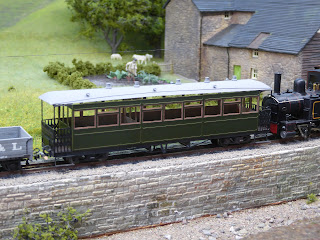
A little bit of progress just before Christmas. The coach has had it's first outing to the paint shop. The panels are sprayed with Bronze Green from a custom paint supplier, the chassis is the same grey I used on Triumph, the balconies were done with coal black, the window surrounds were done with rust and the interior was a mix of antique bronze and ochre.

There are no colour photos from the period so there is a certain level of guesswork along with doing what looks right. The rust could be a little more brown but overall I am happy with the look.

The roof is still in grey primer. I'll aim to darken it a little but colours of roofs after several years service were always indeterminate. What I am not happy with is the bend in the roof which the photograph has cruelly exposed. I've bent it back into shape a little but I am thinking it will be replaced. This roof was made from 5 thou brass sheet and I am wondering if the issue will be less pronounced if I use 10 thou sheet.

The other 2 coaches are on the bench so I suspect I'll do a batch of 3 roofs and see how they come out.


Sunday 6 December 2020

Progress on the Welshpool Coaches


The Welshpool coaches have been on on the back burner for too long. It was time to make progress. The first action today was to complete the roof. I had previously cut the roof with a V at each end and had them rolled to the required radius. I had also cut out some inserts to go in the V. The trick was to hold the roof upside down against some double sided sellotape with the insert roughly placed and then tack a bit of solder to give a little strength and then tack a bit in the other corner. Working like this you can push the ends of the insert around quite a bit until happy with the rough position. After that I bend a bit of waste fret into the inside and soldered that in to provide a base for the join. Adding solder from above then fills the inevitable gap and it is out with the files to smooth it down and make the end shape. The rain strip is then soldered on from 0.31mm brass wire. It gets a little dicey towards the ends as you are in danger of undoing the work already done on the joins.

The fittings on the roof are my own 3D prints and they are superglued in place. The roof was cleaned under the tap with soapy water and then took a turn in the ultrasonic cleaner to remove any final residue.

The next task was to add the truss rods underneath. The undersides of wagons and coaches are always hard to see but I decided the posts for the truss rods were really transverse girders. They should be attached to the underside of the solebars but mine go onto the underside of the floor to provide more strength. After that it was simply a case of adding some 0.5mm wire for the truss rods themselves. A clean and a session in the ultrasonic cleaner and now everything is in the airing cupboard drying out and warming up ahead of priming.

Sunday 22 November 2020

Sierra Leone No. 85


Another lockdown project has been completed. This time it is the Welshpool Sierra Leone No. 85 loco. I first referenced it in one of my October posts. It's been a relatively quick build because that's what I wanted after the length of time it took to complete Triumph. 

One of the ways to make it happen quickly was to adopt the plain black livery that the Welshpool & Llanfair adopted for the engine's last year of running in 2009. They put the engine back to it's original Sierra Leone livery and condition which meant reinstating the front coal bunkers and removing the Welshpool plates from the side of the cab panelling.

The engine is sat on my usual Dapol 2-6-2 Ivatt chassis which needed minimal bits cutting off. I made a few changes to the body. The coal bunkers which were just too chunky in whitemetal. The rear ones I fabricated from brass sheet and rod, the front ones are 3D prints I made. I fitted Greenwich couplings which necessitated some modification to the buffer beams. The air cylinder was a 3D print as the original suffered badly from mould lines where the two halves must have been badly aligned. The supplied tool box just didn't fit so that was another quick 3D print though a chunk of plasticard would have done just as well.

Lastly I made a fresh roof out of 10 thou brass. Having bought a set of G. W. Models bending rollers over lockdown I now wonder how I ever managed without them (actually I didn't, I have largely steered clear of brass till recently). I also modelled the open roof vent since every picture I have seen of this engine has it open. I am guessing that like many steam engines it is hot in the cab.

Overall the Dundas Models kit is excellent. For a whitemetal kit the parts are very crisp and fit together well. There was a slight discrepancy on the length of the side tanks but a bit of filler sorted that and I guessed, correctly as it turned out, that it would not be noticeable once painted.

Having done this one I am tempted to build a second one in the blue livery which it carried from 2003 to 2009. To me, the blue livery is much more attractive than the red North Staffordshire livery it carried from 1992 to 2003. The only problem is the lining which is much more complex than the one engine I have done so far.

That said, there are a lot of kits in the stash and it's time to finish the Welshpool coaches that have been in a semi built state for over a year now...

Monday 2 November 2020

Photographing models

Recently I have found that I have struggled to take good photos of models. I would balance track on different boxes or mounting board but it was never a good experience. I can always use Melin Dolrhyd but the lighting isn't as far forward as it really needs to be for good photographs. I had a piece of track that originally was a DCC programming track set on something that could be fashioned into an embankment but it had no depth so something had to be done.

I found an offcut of MDF and started cutting out foamboard. I had an idea of a curve of track, set on an incline with a platform that could be used to host non track based products. The first picture shows the basic shape. A piece of wood is holding the stone walling join against the platform edge.


After that it was a case of laying track, putting some sandpaper down to represent the platform surface. Rummaging through the bits and pieces box I found some fencing from my first 009 layout and then I found a nameboard from the layout. I had to pause then as most work is done early morning and late night and I realised that static grass cannot be done in artificial light. It needs some natural, if grey, light to help with the colour blending. The second progress shows the progress after doing the grass.


After that it was onto the homeward stretch for a little bit of weathering and a hedge across the back to help with hiding the back. I also have a piece of backscene on a some floating mounting board that can go behind. The final picture is the finished product with Triumph on display with its nameplates that arrived from Narrow Planet recently.


All in all just a few hours work and now I have something readily available for photography.

Thursday 8 October 2020

3D Printing in Winter

I had previously suffered some disillusion over a very low success rate with the 3D printer but I've had quite a run of success over the summer. Oddly, I had my first unsuccessful print the other day, completely out of the blue. The next print was fine but it got me wondering as to why.

Generally the 3D printer is fairly tolerant but I noted that the failed print happened right when the temperature dropped outside. The printer is upstairs in my den but it is next to the most northerly corner of the house and there is this point in the year when the temperature drops but it isn't cold enough to put the heating on.

Reading the label on the next bottle of resin I noted that it said that it works best between 25 and 30 degrees centigrade and we were definitely no longer that warm so what to be done? Reviewing the Facebook support group for my printer I noted that someone had used reptile heaters to heat the printer. You can get ones with thermostats built in but they appeared to have limited control.

In the end I elected to purchase a device that is basically a control box that has a thermometer on a cable and two mains sockets to turn the heaters on and off. I also purchased two small reptile heaters. I then had to drill some holes and into the printer to feed the cables without fouling the lid or any internal mechanisms. The reptile heaters were glued to the inside sides of the printer and the thermometer is glued to the back. All this is carried out with the Bosch cordless glue gun which is in itself a fantastic piece of kit.


Now I can set the temperature to be maintained between 26 and 28 degrees centigrade and if I put it on far enough in advance the resin will be at a suitable temperature for printing. It would benefit from more heat, these reptile pads are only 5W each but the next size up would not fit. It took a few hours the first day but the second day it hadn't cooled off that much and was up to temperature within 90 minutes. At 10W total it could be left on all day. That's less power than this computer uses and 0.3% of our kettle. 


Saturday 3 October 2020

Welshpool No 85

The other project on the go is the Dundas Models Sierra Leone No 85 which runs on the Welshpool & Llanfair. Again, it's a quick build to provide extra locomotive power for the layout as and when exhibitions are back on.

Since being on the WLLR it has had some interesting liveries but after the lining of Triumph I have opted for the full black that was used on the WLLR just prior to it being withdrawn for overhaul. 

The model has gone together well. I would have to say it has been one of the crispest and simplest to put together. The only place that has needed filler is round the smokebox door, the side tank pieces being of slightly different length. Unfortunately you can't just trim a piece off the other end as that end fits tightly into the rear of the cab but really it is a minor inconvenience.

One aspect of modelling it in the year before overhaul is that it had the extra coal bunkers on the front of the water tanks. The bunkers supplied in whitemetal are, of necessity, quite thick. In real life the metal of the bunker would have been half an inch maximum but the thickness of the whitemetal was such that it translates to 3 inches in real life.

I found some brass offcut and bent it to shape but I made the mistake of not filing the groove at the bends with the result that the corners were curved rather than rectangular. Once I had corrected my error it still looked rather rounded. 

I knew I had to redo them but then I realised I could probably just print them. It was the work of a couple of minutes followed by a couple of hours of printing time but it gave me the opportunity to experiment with printing direct on the print bed which worked unexpectedly well, despite the fact that I made the wall thicknesses to be 0.4mm which comes out to just over 1 inch in real life.


The picture shows the three different forms, left to right. I am sure others can fabricate these parts quicker than I can print them but as it was literally 5 commands to design them and 1 extra command to produce the mirrored part, I am happy with what I can achieve.


Saturday 26 September 2020

Axleboxes

If you look closely at what I have achieved so far with the 3D printer it has been very much a case of how to join circles and squares together and how to curve and chamfer edges. I've made plenty of progress and this summer seems to have been very successful in terms of how few failed prints I have had.

Over drinks one evening, my friend Simon was showing his progress on an early GWR horsebox. It has the most intriguing axlebox and spring arrangement where the ends of the springs are connected to J hangers rather than directly onto the solebar which is the more traditional way of doing it. Of course, I decided this was the next challenge I needed.

As always, there is a lack of good photographic evidence since most photos of wagons have the underframe in shadow. There were a couple of good pictures so dimensions were taken and the following was drawn up.

The axlebox itself is still a collection of squares and circles but the spring was the challenge and was built up from 3 point arcs. A circle was put on each end of the top leaves and then it was about trimming the shape to form the circle. It was a couple of hours work but I learnt so much about how to build up more complex shapes. It came out alright but when offered up to the vehicle my interpretation of dimensions was off.


Revisiting the dimensions led to a design that had more depth to it, the axlebox was chunkier and the width was narrower. I also needed to improve the printing supports. I am surprised it printed with what I did on the first pass.


In this form they have gone onto the model. I've learnt quite a bit more about printing and it is nice to give something back to my friends who have been so generous with their time and support for my modelling.

Sunday 20 September 2020

Welshpool Coaches & 3D Prints

 Another huge break between posts. How does that happen? The last 3 months have been largely devoted to 3D printing. After the success with the side windows on Triumph I knew I had to get back to the Welshpool & Llanfair Pickering coaches. The big outstanding task was the roof. How to do it? How to roll it and then the fittings. What were the best fittings, the torpedo vents and the oil lamps. After a couple of purchases that really weren't what I was looking for, I decided I must surely be able to design and print suitable ones.

I've been following Vladimir Mariano on YouTube and he has some excellent courses that have been advancing my skills at 3D design. I had to learn a few more commands but eventually I came up with the following design. There are no drawings for these so they are an interpretation of all the photographs I could lay my hand on.

Having the design is one thing, working through the practicalities of printing took more effort. Essentially the printer prints upside down so you have to think about supporting edges that are in free air. There are also issues around where resin can collect and build up in unexpected places. The final design looked like this - you chop off all the unnecessary bits after printing.

There are nearly always supports required with 3D prints and if you let the printer software add them then they conspire against you and make these size prints take 3 times the time they should. I have developed my own technique for adding supports within the CAD program which is working so far for me. I also replicate items to create strips of 12 items, 5mm apart which nicely fits the printer build plate

Bearing in mind the body of these lamps is only a few mm high they are a tad challenging to photograph but here is the best I could achieve with my camera


The torpedo vent was done in much the same way. There are some drawings but their accuracy is not assured and the photographs are challenging simply because most are taken from ground level and the Pickering coaches had an enormous rain strip which consistently hides useful detail. the WLLR does have some replica coaches but with anything replica there are going to differences with the original and I have no way of knowing what is accurate.

Again, only a few mm high so hard to photograph but the end results do seem to have been worth it.

I have also done the guard's stove chimney for the composite coach along with a brake cylinder to go under the coaches. Who knows, the coaches may make an appearance soon!

Thursday 25 June 2020

Hotel Chocolat Saves The Day

I needed a break from paid work so took a week off. There wasn't a clear plan for the week except to spend time modelling and possibly going to a non-essential shop! I have a few projects on the go and really wanted to complete Triumph and make progress on the Pickering coaches.

What happened was I had some inspiration about how to do something on the 3D printer and, despite the recent problems with printing (not sticking, test file not printing, build plate shifting), I just decided to get stuck in and see where I got to.

What I ended up doing was going on journey printing windows. All the Bowaters engines had sliding windows and stable type doors. It's not clear why but there are two reasonable possibilities

  1. the land is very flat and so the wind howls through
  2. the paper business is very dusty so maybe there is a lot of paper dust flying around
Do a Google search for Triumph then you will see what I am talking about. These windows vary between 1, 4 and 6 panes and I've manage to find examples in green, black or plain wood (presumably paint worn away). The time in question for Triumph they were a green, 6 pane affair.

I did a crude measure of the gap on the engine where the window should go and came up with the following:


The dimensions are roughly 11mm by 9mm. The dimension of the edge probably works for a house window but those on Triumph are much slimmer. I adjusted the dimensions and came up with this variant that was worth painting just to see how it fared:


Getting better, though really I have gone too thin. The core dimension is 0.5mm and, after curing, there is enough strength for the item but I felt it needed refining and so I came up with this:


That looks right. It may not be dimensionally accurate but it looks the part and has the strength to withstand some handling. Time to add the glazing. I have been meaning to try Kristal Klear for a while so I broke it out, read the instructions and achieved this:


It really does dry clear and provide a glazed look. Put the unglazed and the glazed next to each other you see a brewing issue:


The glazing has made the window panes smaller and the frame larger. It's unclear if it is a trick of the light or a leeching of the paint but suddenly it doesn't look so fine. If you put it on the locomotive then it starts to grate for not being as fine as some of the other parts:


If that was the best I could achieve then I would live with it but I wanted to do better.

I had an idea from how doll's house windows are done, typically full sized front but recessed at the back with an insert that holds in the glazing. Doll's house windows are often 10cm in length, not 10mm so would it work?

First I had to find a suitable glazing. That non-essential shopping led us to Hotel Chocolate from which purchases had to be made and said purchases were wrapped in clear cellophane which, according to the micrometer, was 0.05mm thick. 

Back to the CAD package (Fusion 360, free for personal use). If I made the outside depth and edge 0.7mm and put a 0.4mm recess into the frame and produced an insert that was 0.3mm thick then it should just go together with a tad ofspace. Here's what it looks like on the screen.


Those parts are thin but, painted up, glazed with Hotel Chocolat Cellophane, held in with Kristal Klear you get this:


The printing layers are showing at this magnification but the bars have retained their thickness and aren't distorted.

Here is the end result stuck onto the engine with a piece of blu-tak:


It's definitely a case of using the right material for the job. With much encouragement I have been working in brass and made the fire irons on the cab roof out of 5 thou brass and some nickel silver wire (every engine at Bowaters had fire irons on the cab roof).  The oil cans on the buffer beam were another 3D print (again, all engines at Bowaters had them, sometimes just 2, sometimes as many as 5). It took me probably 7 goes to get those right but they really have handles on them and now I have got it right I can print some more.




Sunday 7 June 2020

A green, a green, my kingdom for a green

Finding the right green has been quite a saga through lockdown, requiring several deliveries, none of which were right. Of course, right is a matter of perception but I knew the look I wanted to achieve. Early in the process, Simon de Souza had suggested Humbrol grass green but I had ignored him, as you do. When he suggested it again and did a paint swatch it was, of course the green that most closely matched what I was looking for. A burst of British summer meant I could do the spraying. I elected to paint the black with a brush rather than mask it up as the black blends round the end of the tanks anyway. It would be faster this way.

Another suggestion from Simon was to not use pure black but to use a dark grey. I decided to listen this time. Not having a dark grey I took the quarter full pot of black and added a couple of dollops of white and one dollop of reddish brown - precision mixing.

Then came the lining. Suffice to say I almost threw the engine at the wall. Matt Kean produces beautifully lined models and he would have done this one for me but I wanted to learn. I have several locos tucked away and they all need similar lining so it seemed a skill I should learn.


This is all I have managed so far, one side, both water tank fronts and one cylinder. Some of the lining has had 4 or 5 attempts. It just would not lay flat. I've experimented with red and blue Micro Sol and still not got the technique right but I will get there!

It looks a little toy like without the roof (did I say I bent the one I made...) and would be much better with the correct chassis but that will have to wait until I learn how to make my own chassis. So many skills to learn...

Monday 11 May 2020

How riveting

With several projects on the go it is inevitable that they go slowly. Lockdown hasn't changed the time available during the week for modelling but at least there are good solid modeling times at the weekend.

Here is the work of a labour of love, adding rivets. I lost track of the number of hours spent doing this and there is still the other 3/4 of the engine to do.


It's a job that can be very rewarding when they go on well but when they don't... It is also so fiddly that I lost track of which spacing of rivets to use. The difference is so small that I went "space blind" at one point and definitely used the wrong ones. Also, having started the other side tank I now realise I have missed 3 rivets off this side. I think I may have just labelled myself!

Ultimately I am still pleased with the first attempt at using these decals. I am hopeful it will add depth to the model when finished. I'm guessing another week until all the rivets are on and by then the next attempt at finding the correct green will have been delivered by the postman bearing gifts.

Tuesday 28 April 2020

Triumphant Progress

In my last post I showed work on Triumph, an 0-6-2 Bagnall tank that used to be part of the Bowaters mill complex in Kent.

The body had gone together okay but, being a whitemetal kit, it was not crisp at all and the side tanks just didn't want to be parallel with each other but we got there.

The next stage was to add some detailing. There were a few obvious items that needed adding:

  • There are rods that run along eh top of the water tank on each side so these were made up from a scrap of brass with a nickel silver rod.
  • The safety valve casting had a gap between it and the cab front so that was slimmed down and a piece of brass glued over to represent the lever.
  • There is a rod that runs from the cab to the sandboxes. This was soldered up from a piece of square nickel silver. It should lie flat on the side of the sand domes but I decided to drill out the sand domes and push the rod into them otherwise there would be no strength in the part and be at high risk of being knocked off.
  • There are pipes that run from each sand dome on each side which have a very visible joint in them.
  • A whistle was made up from more brass and nickel silver.
  • It also got a detailed cab from bits of plastic, nickel silver and even some wood.
  • A replacement roof was also formed as the whitemetal one was just too thick.

The photo below shows the finished result though it is cruel from being blown up larger than in real life.


Adding this level of detailing was a new experience for me and practically everything had several attempts before I was happy enough. Generally I chose materials that were too big and needed replacing with something thinner or finer.

It was then cleaned and primed with some etch primer but it has not gone on well. The primer was an existing can that I had used before with mixed results. This time it came out worse, patchy and thick in places. It afforded me the chance to see some of the blemishes that needed fixing but ultimately it's going to be stripped and another can used.

Once the primer is replaced, the next stage of detailing can begin. The real engine has a significant number of rivets on the tanks and once you see them you realise the model is too flat. I've never tried them before but I've been given a sheet of Archers rivets so I built a mock side tank from plasticard, The rivets are very fragile and it was suggested I put them on after priming to limit them disappearing in paint. There was then a question of whether to put them on before the black and/or green. In the end I stuck with straight after primer, then sprayed the green, then brush coated the black as below


After that it was time to consider the lining. Again, something I had not done before but I wanted to try it. I picked up some Fox Transfers in the smallest thickness they had. As warned, they were tricky to keep straight and it probably is better to go for thicker ones and thin them with an overlaid black transfer. Nevertheless I was pleased with the finish. I discovered to my cost that I had no micro sol/set in stock and it shows with the various transfer edges still being visible and not being able to bend a transfer round the larger curve. The smaller curves were bought. I counted that there are 30 small curves on this engine alone so that sheet was worth purchasing.


The result is pleasing and with practice I ought to be able to avoid some of the mis-joins that you can see close up.


Saturday 4 April 2020

Not Going Out

The world has changed and not immediately for the better. Here in the UK we are two weeks into lockdown and are trusting that the measures in place will keep the number of deaths from Covid-19 under 20,000 which is what is described as a "good" figure. The immediate impact for me is working from home and I am one of the fortunate ones who can do that and carry on getting paid. Not everyone is so fortunate. There is more time and some of that time has been spent on reorganising the "office" so I can work from home all day. The computer has gone from the den where I used to occasionally work from home and, as a result, I now have a larger workbench for my modelling. I have had a serious reorganisation of the room and this is the result.


This means I can have more projects on the go at once. Usually I try to stick to just one project at a time but with multiple projects I get the chance to move to another one when I hit a roadblock on one and need to do some thinking. Also, I have the space so why not use it. Equally all exhibitions have been cancelled so now I have no deadlines and can afford to be a little less focused.

The first project is the model of Triumph mentioned in the last blog. The body is largely complete and I have been contemplating the detailing. Today I drilled out of the windows so I can put in open ones. I should have done that before building it! More on those in another blog.


It's clear that in the future there is going to be a layout based on Bowaters so I expect a Facebook page to appear soon. Bowaters itself is not easily modelable but I will find something from it to create a layout from. I look forward to building something more industrial. In the meantime the locos can run on Melin Dolrhyd provided they can get round the curves!

The second project is the 3mm 4F kit that I bought a while ago. I used to model in 3mm but could not make a working chassis. I am going to have another go and am determined to be successful this time. I invested in a Poppy's jig and have got as far as loosely assembling the parts in the jig.


I have a couple of options for motor and gearbox. I do have an N20 motor and gearbox combination produced by a member of the 3mm Society and I have a High Level Slimliner+ on order. When that arrives I will make a decision on which to use.

The third and final project is Southwold in 3.14mm to the foot. David Eveleigh designed this stock to run on 2mmFS track and it came out to this weird scale of 3.14mm to the foot which is close enough to 3mm and so there will be a layout in 3mm that contains standard gauge and narrow gauge and it will be Southwold based - you can't hide the shape of those wagons.


David's etches contains 16 four wheeled wagon chassis, 4 six wheeled wagon chassis, 2 coaches and 3 engines plus some odds and sods - a whole layout's worth at one go! As you can, see the etch above for one of the wagons is exquisite. It is also tiny!

That's it. Everything on the workbench currently and, yes, I am procrastinating over the Welshpool & Llanfair coaches!

Sunday 1 March 2020

On Becoming an Author

In the last 2 months I have had two articles published. The first was in Issue 121 of Narrow Gauge & Industrial Railway Modelling Review. The second was in the March 2020 issue of 009 News.


The articles were written for slightly differnet audiences but both were an overview of the layout, how it came about and how it got to the state it has. Needless to say there is a very nice feeling of accomplishment, otherwise known as smugness, that the work done is of sufficient quality/interest to be included in these magazines.

I have one more article in the making but I need to finish the model I am writing about. More to come in the future! 

Tuesday 25 February 2020

The first cut is the deepest

The Kenavon show has been and gone. The layout ran very well though the Earl definitely prefers travelling anti-clockwise. A couple of couplings and lead weights came off when I was packing away and I also dropped a cattle wagon which broke into 4 parts but all were fixed in a 15 minute session on Sunday.

The one obvious problem was that I had previously made some card tunnels to prevent light getting in from the sides but they have warped slightly and because I made them too small the stock was always hitting them. There is absolutely no way the coaches are going through so new ones need making before the next show.

I also need some information for visitors to read. I was asked the same questions over and over again so have ordered some acrylic stands to go on top of the layout - the advantage of a layout with a top! The bookmarks I had ordered were a great success, I gave them out to all the children and some adults as well.

The next show is Nailsea at the end of March and that is likely to be a much tougher test of the layout as it will be its first 2 day show. I possibly have enough stock but I think one more engine would get the roster up to something that can accomodate one or two failures without having to repair on the fly. I also should finish the coaches but I sense some serious procrastiantion going on there...

I've had the kit of Triumph from the Bowaters Paper Mill complex, now preserved as the Sittingbourne and Kemsley Railway, in the stash for a while along with a spare Bachmann 2-6-2 N gauge loco. The kit is meant to go on a Minitrix 2-6-2 chassis but I used the Bachmann under Joan and it is a very good runner.

As always, there is some initial work to marry up chassis to footplate and some significant cuts had to be made to open up the footplate to accomodate the block of the motor. Hopefully it will be worth it.


I was not aware of the Bowaters Mill Complex until recently and it looks a fascinating prototype, not least because they also had the engine Monarch which went to the Welshpool and Llanfair where it performed equally badly and a kit is available...

Sunday 9 February 2020

How an impending exhibition focuses the mind

The exhibition season is about to start. Melin Dolryhd is going to appear at 3 exhibitions in 3 months. Over Christmas I made great progress on coaches but then January came and all I can say is that I am glad January is behind me. It was a month of calamity in the Taylor household and progress on hobbies came to a very solid halt!

Now with 2 weeks to go till the first show of the year I need to make some progress. The layout is fine as it is and there is always detailing to do but I am short of trains to be comfortable with a one day show and am definitely short of stock for a 2 day show should any of them feel the strain.

Joan is back available though still needs detailing. Hopefully it's plates will arrive in time but it made sense that since Joan is a preservation engine of the WLLR then it should haul a preservation train so a hunt of ebay and hey preto, an instant train.


Having set the time period of the actual layout to 1912 I have a few more options in terms of stock. Bolster wagons, flat wagons and sheep wagons all existed by this point in time so examples of all are in the paint shop waiting to be completed. First one completed are the sheep wagons.


If any more wagons are finished before the first show then it will be a bonus. For now, I believe I have enough stock to run for a day.

I wonder if anyone will notice but these pictures were taken on my new phone. Up till now all pictures were on my Panasonic DMC-TZ60 Compact Zoom which is a great camera which I used because my old phone had a rubbish camera but I've upgraded my phone to a Samsung A40 and it is nice to once again have a phone with a decent lens in it.

If you want to know which shows I am attending then please pop across to the website or Facebook page.

Saturday 4 January 2020

And Then There Were Two

Not yet at the full complement but with some perseverence the second coach is now in the same state as the first. The confidence of having worked out all the issues on the first coach showed with how quickly this one went together.


I'm using Lilliput bogies under these coaches but the couplings on the bogies were fouling the underframe and everything else is Greenwich so I ordered some Centre Point Couplings from Sven at Tramfabriek and they were really quick to put together and they just work.

I have the third coach to build but I am short of bogies for those. I have some Banwy ones to try but I'm not sure I want to mix and match now that the Lilliput ones have proved effective. Can I sneak some more modelling time tomorrow to get the full set - I might even play the album to celebrate!

New Year Update

It's been a busy few weeks on the railway front. First it was the SWOONs open day on the Saturday where I had my sales stand for STModel...